
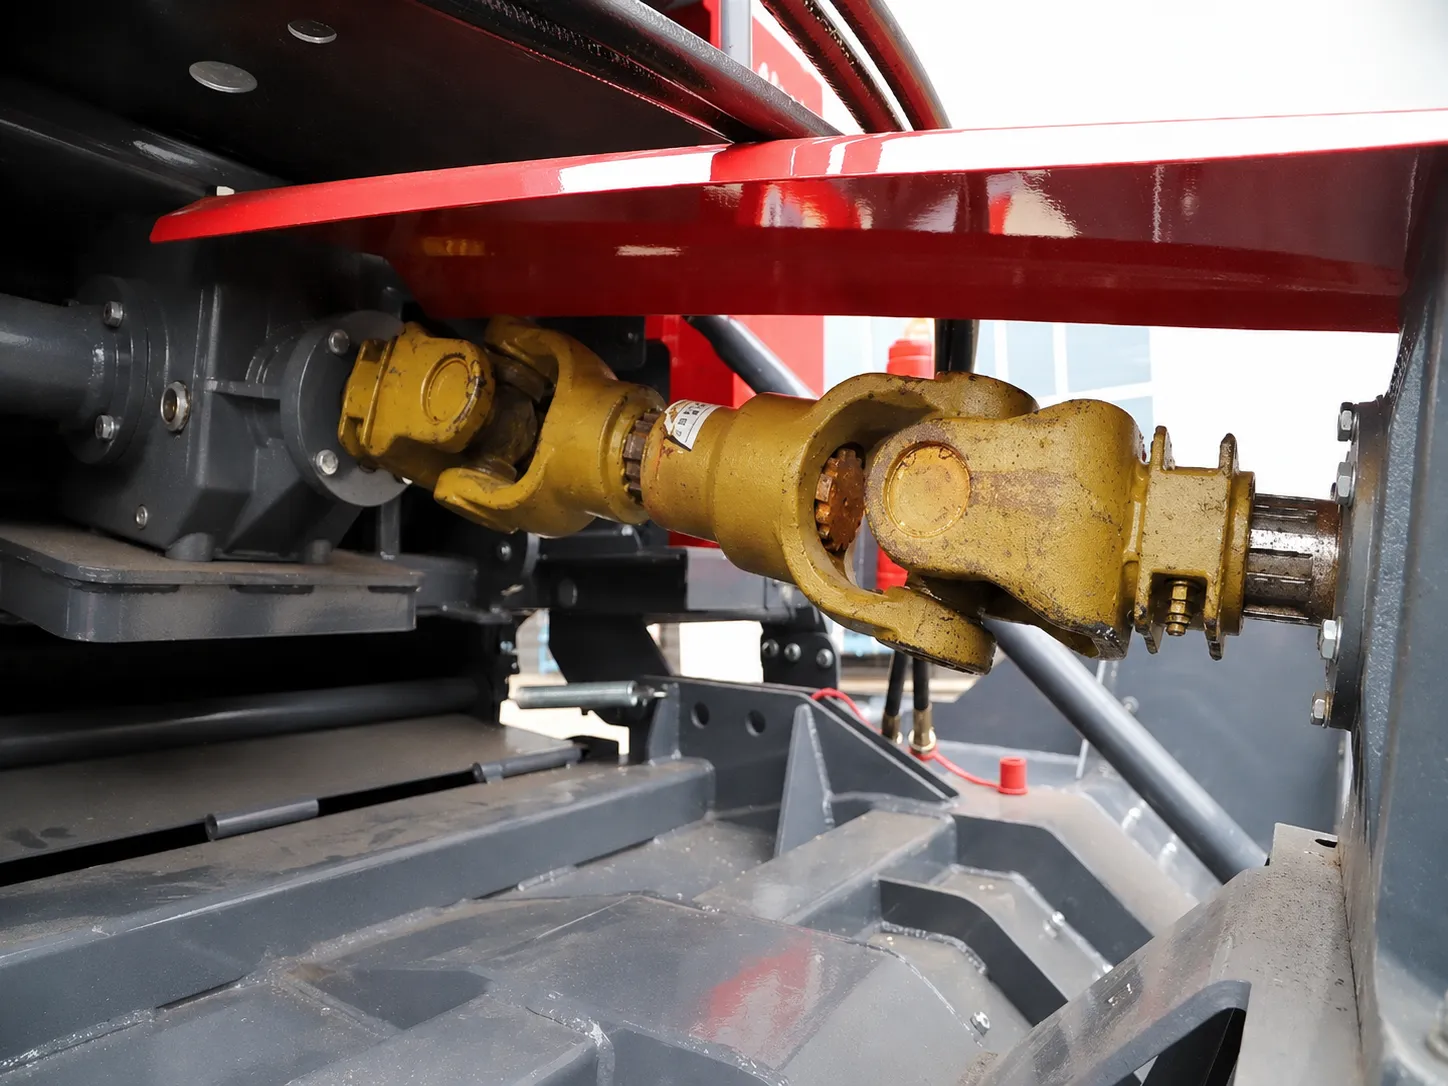
The PTO driveshaft and hydraulic connections on a square baler. Correct setup at the tractor connection point is the most critical factor in baler performance and longevity.

Setting up a tractor baler correctly before entering the field is the single most effective way to maximise machine performance, reduce maintenance costs, and prevent the type of mechanical damage that turns a normal harvest day into an expensive repair job. Most baler problems that operators report — inconsistent bale density, knotter failures, pickup blockages, broken drive shafts — are directly traceable to incorrect setup rather than machine quality. This guide covers every setup step for the 9YF square baler range and applies broadly to any tractor-mounted square baler operating in paddy, wheat, or mixed-crop conditions.
The tractor baler setup process is not complicated, but it requires methodical attention to detail at each connection point. Each section of this guide covers one critical setup area — complete all of them before putting the machine in the field for the first season and repeat the key checks at the start of each subsequent season.
PTO Speed and Driveshaft Setup
The power take-off (PTO) system is the mechanical link between the tractor engine and the baler’s drive mechanisms. All models in the 9YF square baler range operate at 540 rpm PTO speed. This is not negotiable — running the baler at 1000 rpm PTO speed will over-speed the flywheel, knotter mechanism, and pickup drive, causing immediate or rapid-onset mechanical failure.
Confirming PTO speed on your tractor
Modern tractors typically offer a switchable PTO between 540 rpm and 1000 rpm. Before engaging the baler, confirm the PTO selector is set to 540 rpm. On older tractors without a selector switch, verify the engine RPM required to reach 540 rpm at the PTO output shaft — consult your tractor operator manual for the engine RPM to PTO RPM ratio for your specific model.
PTO driveshaft length check
The PTO driveshaft connecting the tractor to the baler must be the correct length for your specific tractor-baler combination. An incorrect length creates two failure modes:
- Too short: the shaft separates from the tractor PTO output shaft when the tractor turns at full steering lock or when the baler bounces over uneven terrain — causing sudden loss of drive and a safety hazard
- Too long: the shaft telescopes fully and the yoke bottoms out at full compression of the three-point hitch — causing shaft seizure and potential gearbox damage on the baler
With the baler hitched and the PTO shaft connected, check two positions: maximum compression (hitch at its lowest point, tractor at full steering lock) and maximum extension (hitch raised fully, driving in a straight line). The shaft should have at least 150mm of overlap remaining at maximum extension and must not bottom out at maximum compression. If it fails either check, the shaft must be adjusted before use.
The PTO driveshaft connection point on a square baler. The telescoping overlap must be checked at both maximum extension and maximum compression before any field operation.
Hitch Type and Three-Point Linkage Configuration
All 9YF square balers use a Category I or Category II three-point hitch connection. The correct hitch category depends on the tractor model — most Indian tractors in the 40 to 80 HP range use Category I hitch, while heavier tractors above 80 HP typically use Category II. Confirm your tractor’s hitch category before connecting the baler.
Three-point hitch height during baling
During baling operation the three-point hitch should be set to allow the baler to float — meaning the hitch is not locked at a fixed height but is in a position where the baler’s own transport wheels carry the machine’s weight. The three-point hitch should not be actively supporting the baler’s weight during field operation, as this transfers unnecessary vertical force to the tractor’s rear axle and alters the pickup height in ways that are difficult to control consistently.
Swivel hitch requirement
For baling on uneven terrain — common in paddy fields in India where soil preparation can leave significant undulations — a swivel hitch (also called a pick-up hitch or floating drawbar) significantly improves pickup ground contact consistency. The swivel allows the baler to roll independently of the tractor on lateral ground undulations, keeping the pickup at a more consistent ground clearance than a rigid hitch connection allows.
Paddy fields in India often have irregular surface profiles from the effects of puddling and transplanting. A swivel hitch connection reduces the frequency of pickup ground contact (which causes soil ingestion) and pickup lift-off (which leaves straw behind) by allowing the baler to follow the ground contour independently of the tractor.
Pickup Height Adjustment for Different Crops and Conditions
The pickup height adjustment controls the ground clearance of the bottom of the pickup tine sweep arc. This is one of the most frequently misadjusted settings on balers in Indian field conditions, and it has a direct impact on both crop collection efficiency and machine wear.
| Crop / Condition | Target Pickup Ground Clearance | Notes |
|---|---|---|
| Flat paddy terrain | 25 – 35 mm | Clean flat windrow, standard soil conditions |
| Uneven paddy terrain | 35 – 50 mm | Increase clearance to prevent soil ingestion on high spots |
| Wheat straw, flat field | 20 – 30 mm | Wheat straw lies flatter than paddy — lower clearance for better collection |
| Alfalfa / clover | 25 – 35 mm | Leafy material — avoid soil contact to prevent contamination |
| Rocky or stony ground | 50 – 65 mm | Protect tines from rock damage |
| Corn stalks (9YF-2200S) | 40 – 60 mm | Higher clearance for shredder mechanism on standing material |
How to measure and set pickup height
Park the baler on a flat concrete or hardstand surface. Lower the pickup to operating position using the height adjustment mechanism. Use a ruler or tape measure to check the distance between the lowest point of the tine sweep arc and the ground surface. Adjust using the height adjustment linkage — typically a pin-and-hole adjustment with multiple positions — until the target clearance is achieved. Check the clearance at both the left and right ends of the pickup to confirm it is level.
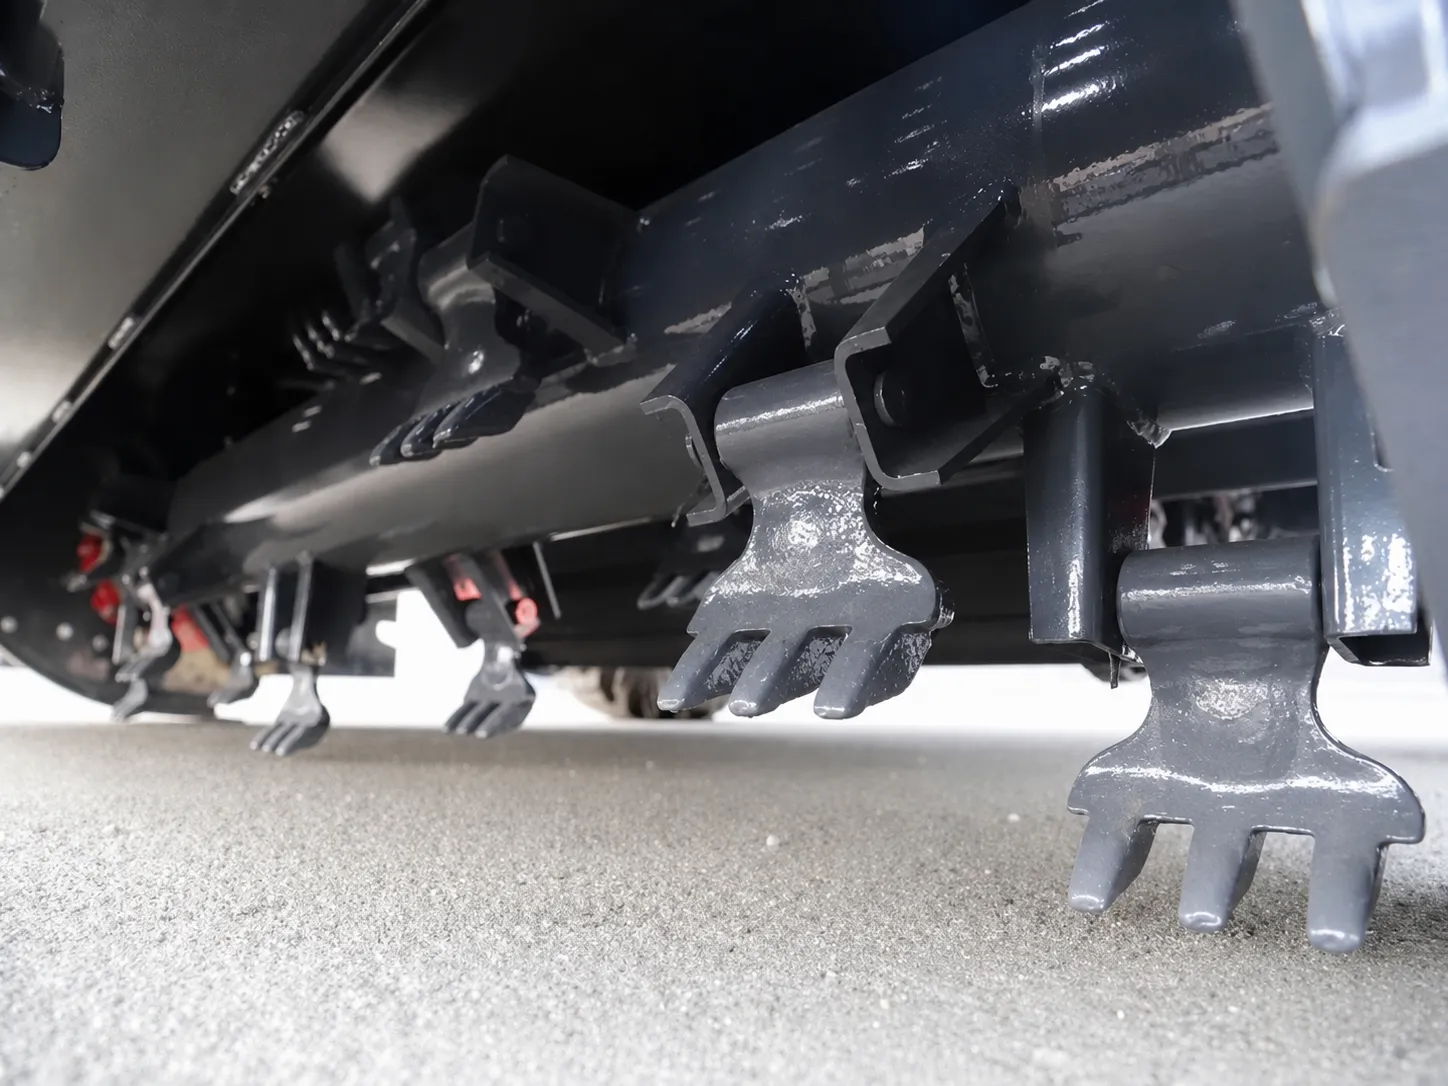
The spring-tooth pickup mechanism. The ground clearance is set using the pickup height adjustment linkage — check and set before every new field or crop type.
Hydraulic Connection Requirements
Standard 9YF square balers require one set of hydraulic remote couplers from the tractor for the bale ejector system. The ejector cylinder opens the rear door of the baler to discharge completed bales and retracts it for the next bale cycle. Confirm your tractor has at least one set of remote hydraulic outputs available before connecting the baler.
9YF-2200S dual-crusher hydraulic requirements
The 9YF-2200S with dual-crusher and negative-pressure fan requires two sets of remote hydraulic outputs — one for the bale ejector and one for the shredder height and fan speed control. If your tractor has only one remote output, you will not be able to operate the dual-crusher model without a hydraulic splitter valve or an additional remote output kit.
Hydraulic pressure and flow requirements
The standard 9YF series hydraulic requirements are within the normal output range of any tractor in the compatible HP range. There are no unusual pressure or flow demands on standard models. The 9YF-2200S dual-crusher has higher flow requirements for the fan drive — confirm your tractor’s hydraulic pump output against the machine specification sheet before ordering if you are at the lower end of the compatible HP range.
Pre-Season Inspection Checklist
Complete the following inspection before the first use of the season and after any storage period of more than 3 months. This checklist covers the items most likely to cause field stoppages or damage during the first hours of operation.
- Grease all lubrication points — count the grease nipples on your specific model and verify each one is accessible and accepting grease
- Check all drive chain tension — chains should have 10 to 15mm of vertical deflection at the mid-span when pressed with your thumb
- Inspect knotter mechanism — check bill hook, twine disc, stripper finger, and trip latch for wear or damage
- Thread twine through the complete twine path and check that the twine tensioners are set correctly for your twine diameter
- Check PTO driveshaft guards are in place and rotating correctly
- Inspect all pickup tines for bending, cracking, or loss of spring tension
- Test the bale ejector hydraulic cylinder through one complete open-close cycle
- Check all wheel bearing play and tyre pressure on transport wheels
- Verify the bale tension setting for your crop — paddy straw typically requires lower tension than hay or alfalfa
The knotter mechanism requires lubrication with a light oil at every 8 to 10 operating hours — not just at the start of the season. A dry knotter mechanism is the single most common cause of mid-season knotter failure on square balers. Use the correct knotter oil as specified in the operator manual — do not substitute with general-purpose grease.
Field Operation Settings for Maximum Performance
Once the baler is correctly set up and connected to the tractor, the following operating settings determine field performance. Adjust these settings in the first hour of operation to match your specific field and crop conditions.
Bale length setting
The bale length is set by the bale metering mechanism — a star wheel or trip cam that counts the number of crop layers entering the chamber before triggering the knotter. Longer bales contain more material and reduce the total bale count per hectare but increase bale weight. Shorter bales are easier to handle but require more twine per tonne of material baled. Set bale length to produce bales in the 20 to 30 kg range for hand-stacking operations, or 40 to 60 kg for mechanised handling.
Bale density setting
Bale density is controlled by the compression pressure mechanism — a tension spring on most square baler models. Higher spring tension produces denser bales with higher weight per bale. For paddy straw and wheat straw, use medium to high density settings to produce bales that hold their shape during stacking and transport. For alfalfa and leafy crops, use lower density to reduce leaf shatter during compression.
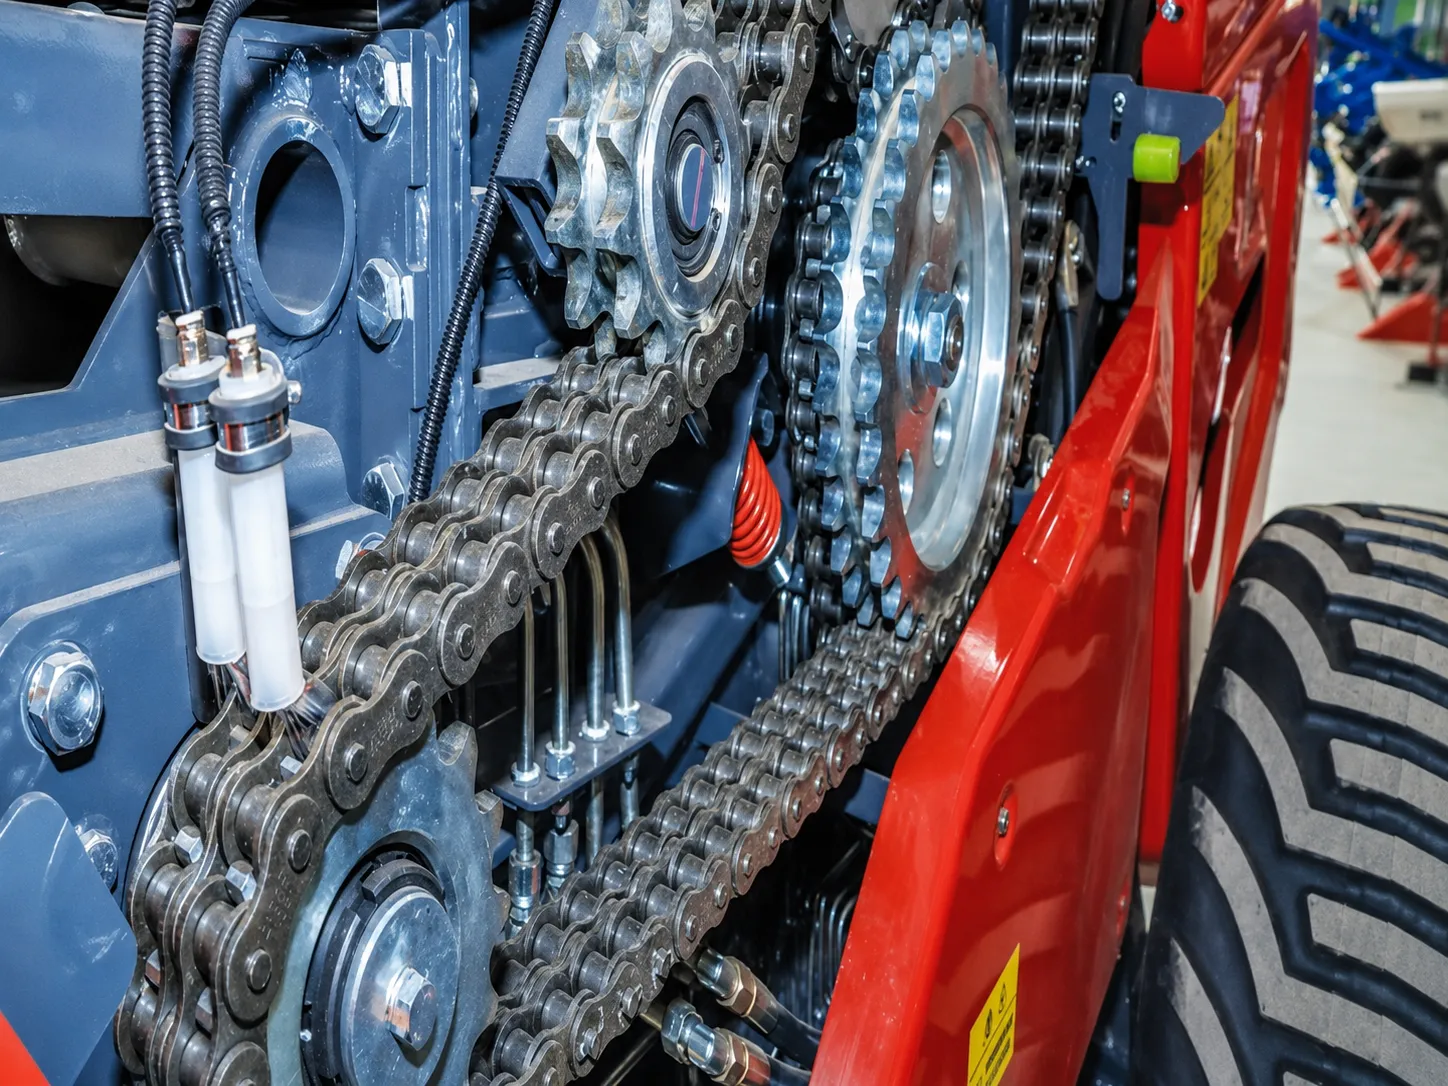
The chain drive transmission on the square baler. Correct chain tension — 10 to 15mm deflection at mid-span — is a critical operating setting that must be checked at the start of each day.
- Square Baler for Paddy and Wheat Straw — crop-specific baling guide
- Corn Stalk Baling Guide — why standard balers fail and what to use instead
- 9YF-1900 Mid-Size Square Baler — full specifications
- 9YF-2200 Large Square Baler — full specifications
- Straw Baler Machine Price Guide 2026 — complete FOB price reference
Frequently Asked Questions
What PTO speed is required for the 9YF square baler range?
All models in the 9YF square baler range operate at 540 rpm PTO speed. This applies to the 9YF-1700, 9YF-1900, 9YF-2200, and 9YF-2200S. Do not operate these machines at 1000 rpm PTO speed — over-speeding the mechanism causes immediate or rapid mechanical failure. Confirm your tractor’s PTO selector is set to 540 rpm before engaging the baler.
What hitch category does the 9YF square baler use?
All 9YF models use Category I and Category II three-point hitch connections. Category I is standard on Indian tractors in the 40 to 65 HP range. Category II is standard on tractors above 65 HP. If your tractor uses a different hitch category than the baler, a hitch adapter is required. Confirm the hitch category match before delivery.
How do I set the correct pickup height for paddy straw baling?
For flat paddy terrain set pickup ground clearance to 25 to 35mm. On uneven or cloddy paddy ground increase to 35 to 50mm. Check the clearance on both left and right sides of the pickup to confirm it is level across the full pickup width. Re-check pickup height when moving between fields with different surface profiles.
How often does the knotter mechanism need lubrication?
D-type knotters require lubrication with light oil every 8 to 10 operating hours. Do not extend this interval — a dry knotter is the single most common cause of mid-season knotter failure. Use the knotter oil specified in the operator manual. In addition to the 8 to 10 hour lubrication schedule, inspect the bill hook, twine disc, and stripper finger for wear at the start of each working day.
What should I do if the baler keeps producing bales with one loose end?
Inconsistent bale density with one loose end is typically caused by one of three issues: the windrow is narrower than the pickup on one side, causing uneven material entry; the bale density tension spring is at different settings on the two sides of the compression mechanism; or one of the two knotters is timing incorrectly relative to the other. Check windrow width, verify density settings, and inspect knotter timing before continuing operation.
Tell us your tractor HP, primary crop, and approximate seasonal bale volume. We send a matched model recommendation and factory-direct price — no sales pressure, no intermediary margin.